Curvy Pinwheels tutorial

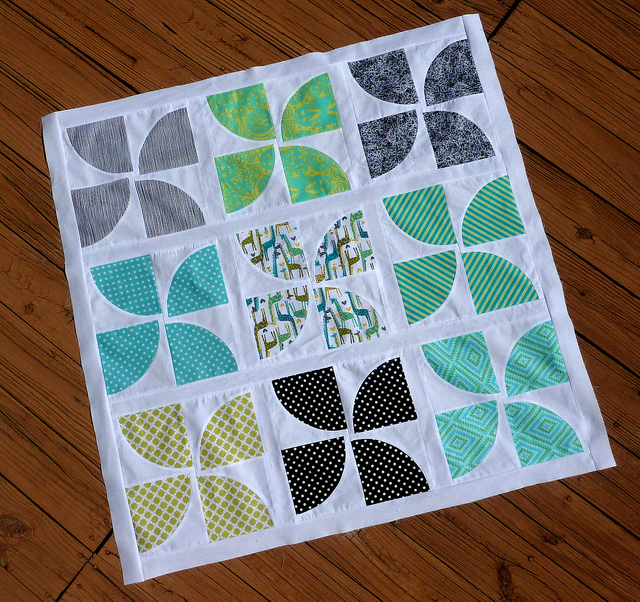
I'm excited to bring you a tutorial for this really cute block! It's my take on the classic pinwheel block and finishes at 12" square. Don't let the curves scare you, they're pretty easy if you try :)
I just finished my baby quilt top with it today:
Here's what you'll need per block:
One fat eighth print fabric (inner curves)
One 6.5" x 16" piece for background fabric (outer curves)
Now, as far as the background fabric goes....one 6.5" x 40" strip of fabric yields enough backing for 2.5 blocks. So if you are doing multiple blocks, you can cut WOF strips from yardage.
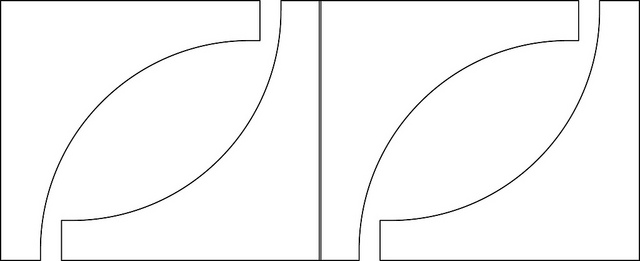
Cutting guide for inner curves - cut 4:
Using the diagram below, place the inner curve cutting guides on your fat eighth piece of fabric. Trace and cut.
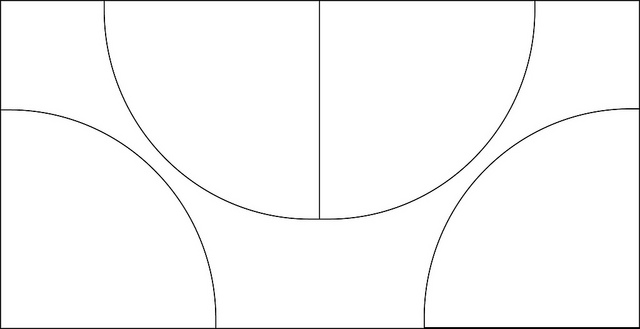
Cutting guide for outer curves - cut 4:
Using the diagram below, place the outer curve cutting guides on your background fabric. Trace and cut.
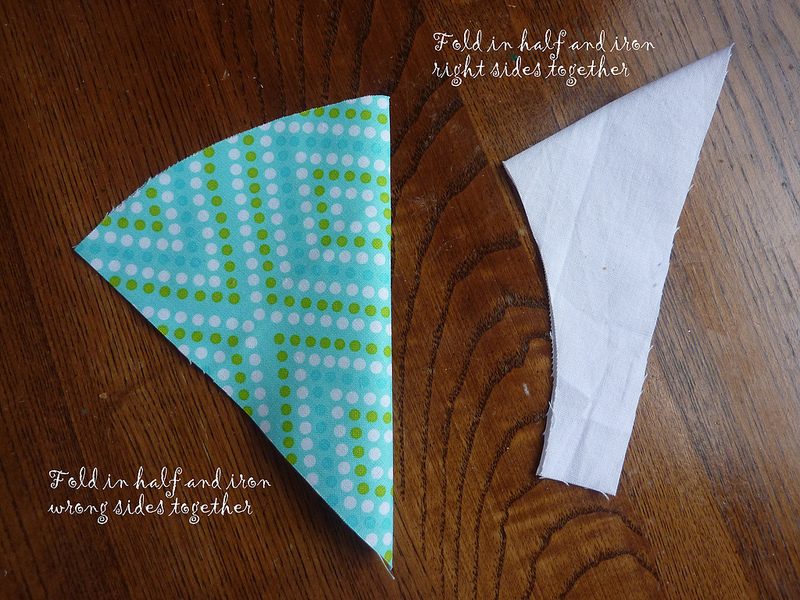
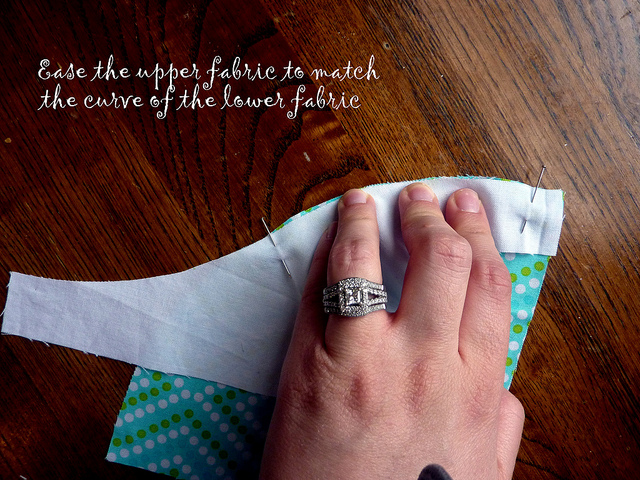
Piecing Instructions
Follow these step-by-step photos to create one block.


While you're stitching, it may look as though the fabric is creasing - make sure you look at the fabric directly under the foot, not at the fabric to the left. As long as the fabric directly under your needle isn't creased, then it doesn't matter if it looks bunched up to the left of the seam. You can see this clearly in the above left photo - it looks like I'm sewing in a huge crease! But in the righthand photo, you can see that the bunching only occurs to the left of the seam.
Below you can see how it will look when completely sewn:


I finished up my quilt by cutting eight 2" strips to use for sashing. The quilt top finished at 42" square.