You asked, and here it is! A tutorial for my improv herringbone block.
Supplies you'll need:
- a pile of colored scraps
- 5(ish) strips of white, 3/4" x WOF (width of fabric = approx 42")
- cutting supplies: rotary cutter, cutting mat, ruler
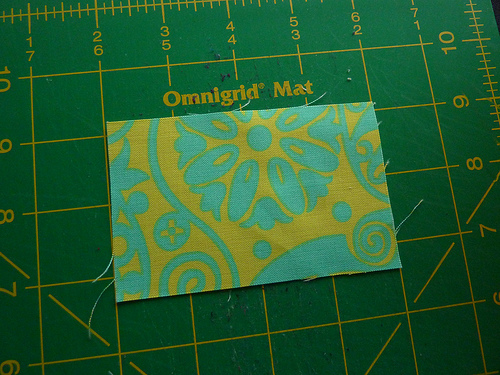
Step 1
Choose a scrap for your first piece and cut it to 2.5" x 4"
Step 2
Lay the white strip across the first piece to decide where you want to cut (picture one). Use your ruler to cut along the edge of the white strip (picture two). Trim the white strip, sew the pieces together (picture three), and press your seams open.
Step 3
Next you will attach the next colored part of your herringbone weave. Choose the piece you want and cut the side that will be sewn to the white strip so that it is straight. Sew to the white strip and press seams open (picture one). Trim the excess fabric from the side, making sure you maintain an even 4" width across your herringbone strip (picture two).
I tried both pressing seams open and pressing them to the side and found that pressing them open was the best way to keep the 1/4" width consistent. Too much fabric is "lost" when pressing to the side. It gets a little dicey in the back when pressing, so be sure to use a scant 1/4" (open seams shown in picture three).
Repeat steps 2 and 3, alternating sides each time, until your herringbone strip is longer than 11.5". Don't forget to trim to 4" after attaching each colored piece! (picture four below)
Trim to exactly 11.5" in length (do as I say, not as I do - I accidentally cut mine 11"!). Create 3 of these herringbone strips.
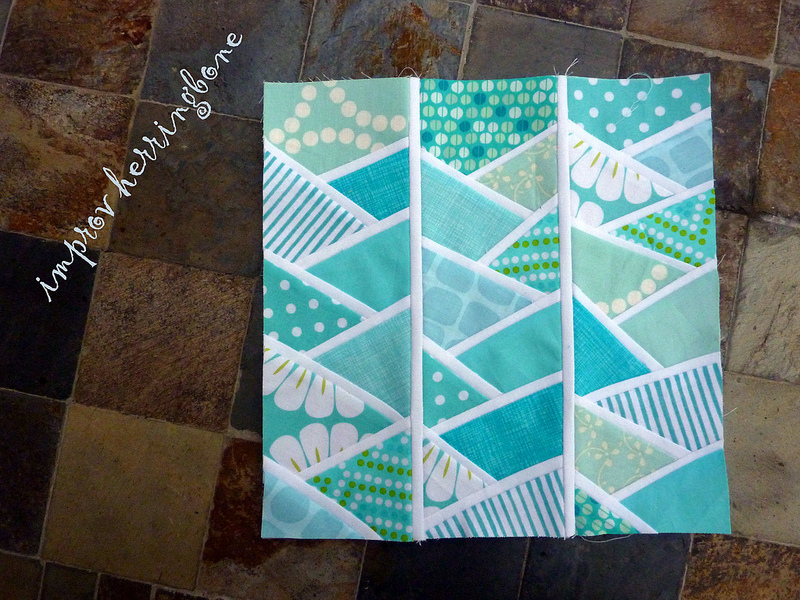
Step 4
Assemble the block by piecing together two white strips that are 11.5" in length between your three herringbone strips. Done! You know have an 11.5" square improv herringbone block that will finish at 11" in a quilt.

My original block was a little bit smaller (10" square unfinished) and probably works better for the size scraps that I have (they are teeny!). For this, my herringbone strips were 3.5" instead of 4".
To work out a different size for your block, use these equations:
For a block using 1/4" wide white strips:
width of herringbone strip x 3 - 0.5" = size of (unfinished) block and also length of herringbone strips
For example.... I wrote the tutorial with 4" wide strips.
4" x 3 - 0.5" = 11.5"
So trim your herringbone strips to 11.5" in length, add the quarter inch white strips between them, and your block will be 11.5" unfinished (or 11" once you sew it into a quilt). You can use this to choose what size you want to make your own blocks!
For a block with wider white strips:
Now, if you want to make a GIANT improv block, you'll probably want wider white strips. The strips in the blocks I've shown finish at 1/4". Use the formula below to figure out your sizing with custom width white strips. (When cutting your white strips out, don't forget to add 0.5" for seam allowances.)
(width of herringbone strip - 0.5") x 3 + width of finished white strips x 2
=
size of (unfinished) block and length of herringbone strips
Happy improving!