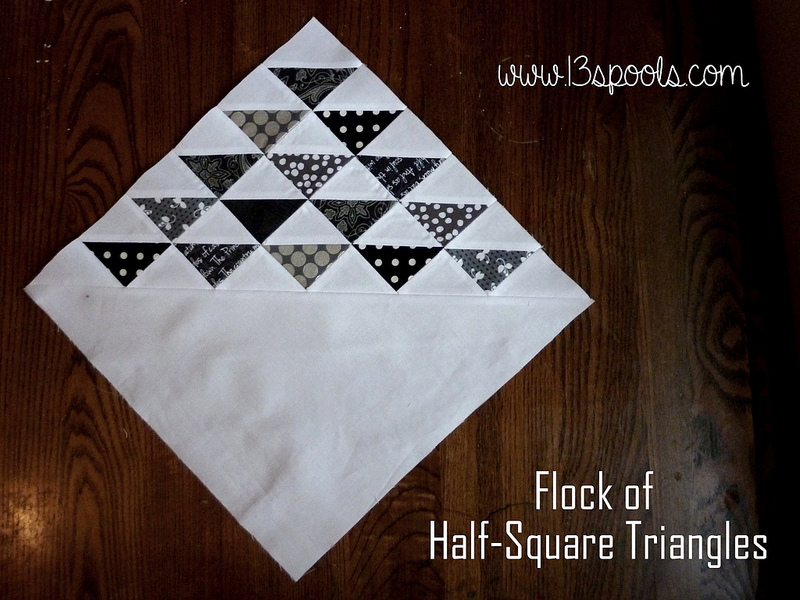
Flock of Half-Square Triangles: block tutorial
I'd like to introduce to you the Flock of HSTs block!
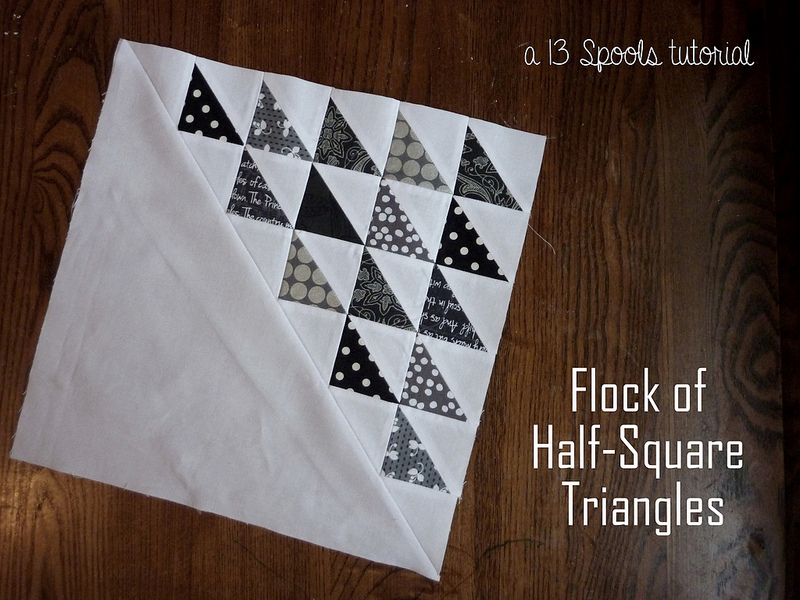
This block is great for bees (divvy up the work of making triangles!) and for using up your scraps. It ends up being 12.5", or 12" when sewn into a quilt. You'll need 15 HSTs (one side white, one side colored) that are cut to 2.5" for this block. I also suggest pressing all seams open, since there are a lot of seams coming together in this block. You can make the half square triangle units (HSTs) by any method you choose, but I'll talk a little about the two methods I used.

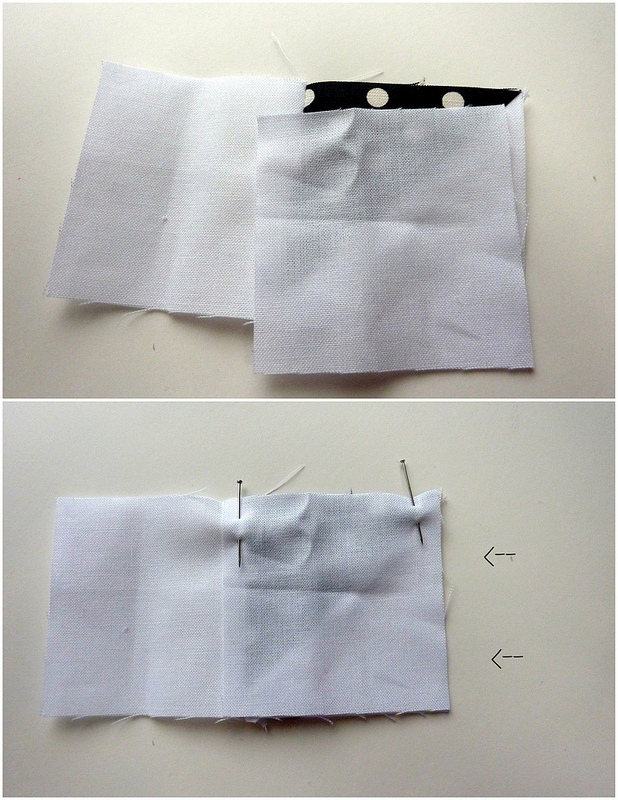
I made some of the HSTs with the two squares method. This makes two units at a time.
Pin together one white square and one colored square. Draw a diagonal line, corner to corner, and stitch 1/4" away from the line on each side. Then cut along the line. You'll have two units! Open and press them.
If you use this method, you'll need 8 white and 8 colored 2 and 7/8" squares. (this will make 16 units)

I made most of mine with this awesome tutorial by my friend Lindsay to make 8 units at a time! The tutorial is for an entire quilt, so just follow the instructions about the HST method. You'll need to use 5.75" squares for this method, one white square for every colored square. This is a good method to use if you are making a number of blocks at a time. I went crazy and made over 60 HSTs. It was so fast and easy with this method! If you use this method for a small number of blocks, you'll get a lot of units from the same print and you won't get the same amount of variety of the print fabrics, so keep this in mind when choosing how to make your HSTs.

Whatever method you like to use to make the HSTs, just make sure you get 15 accurate 2.5" HST units. Once that part is done, you'll need:
- six 2.5" white squares
- one 12 and 7/8" white square
Next, arrange your HSTs into a pyramid.


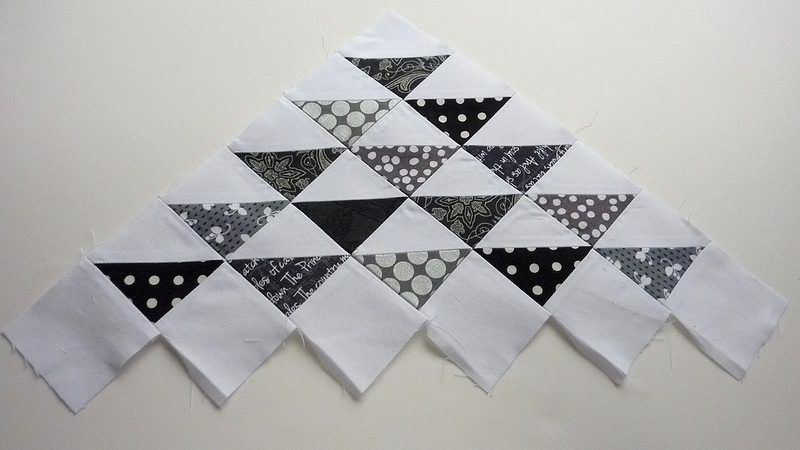


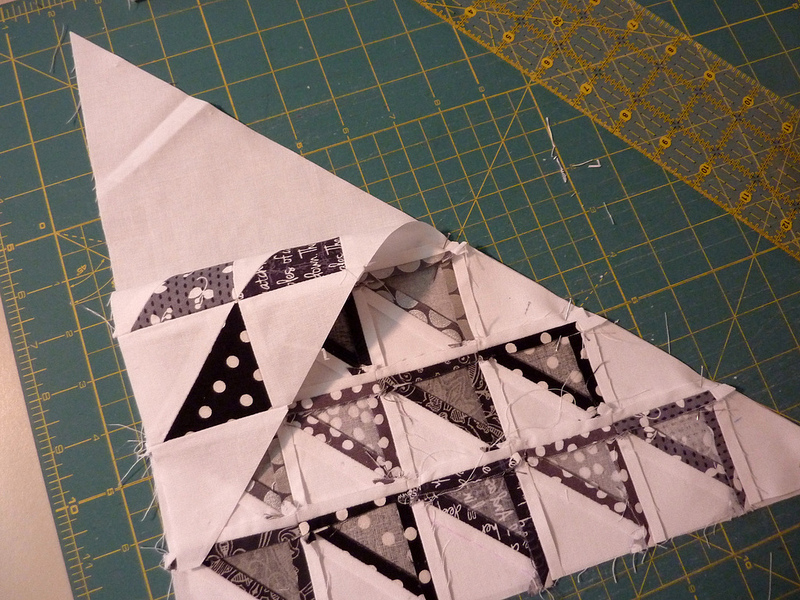
Add the 2.5" white squares.
Sew each diagonal "row".
Next, you'll sew the rows together. I placed the shorter row on top each time, and you'll see that all the seams match, and the white square at the end of the short row goes past the seam on the other row. No worries - that's supposed to happen!
When you get to the shortest two rows, you'll be sewing a single white square on top of a row of two blocks. Line the white square up with the edge of the HST unit. It will overlap slightly onto the white square.
Press all your seams open and you're almost done!
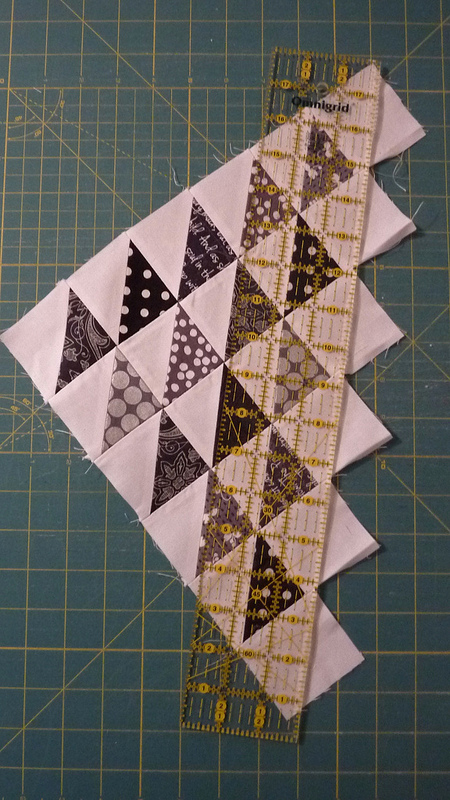
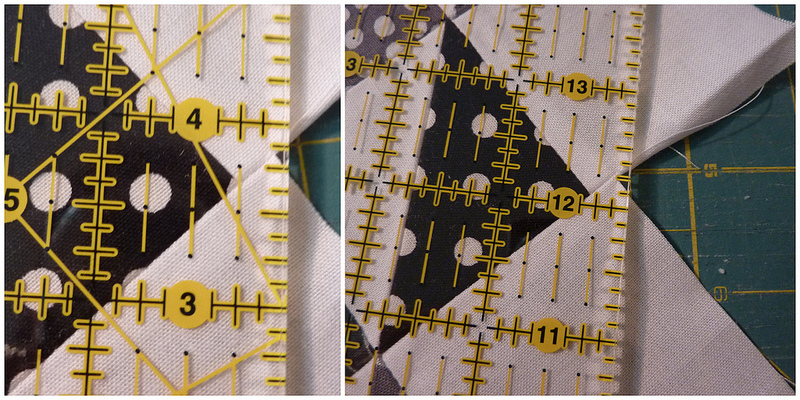
It's time to trim off the excess! Line up the 1/4" line of your ruler along the points of the five colored triangles on the bottom of the pyramid.
If they don't all line up exactly, it's better to leave a little extra white space along some rather than to cut some short. The below left photo shows one triangle line up accurately, the below right photo shows one lined up with a little extra breathing room. Now, if you're a perfect piecer, this won't happen :)
By trimming this way, you'll be setting up the block so that when you sew a 1/4" seam, it will just touch the corners of these triangles.
Next, you'll need to cut the 12 and 7/8" white square in half diagonally. I used my Omnigrid ruler to do this, but had to use the 45* angle line since it wasn't quite long enough. You can also fold the square in half (diagonally) and press it, then cut along the crease if you prefer.
Pin the flock of geese half of the block on top of the large white triangle. Be sure to use a scant 1/4" seam allowance so you don't grab any of those triangle corners!
Press open and you're done! Voila! You now have one Flock of HSTs block.
I'm having members of my do. Good circle make blocks like this, and I'm envisioning a finished quilt with blocks sashed and set on point:
Enjoy!**Update: these blocks are looking great together! See the pieced top here.**
