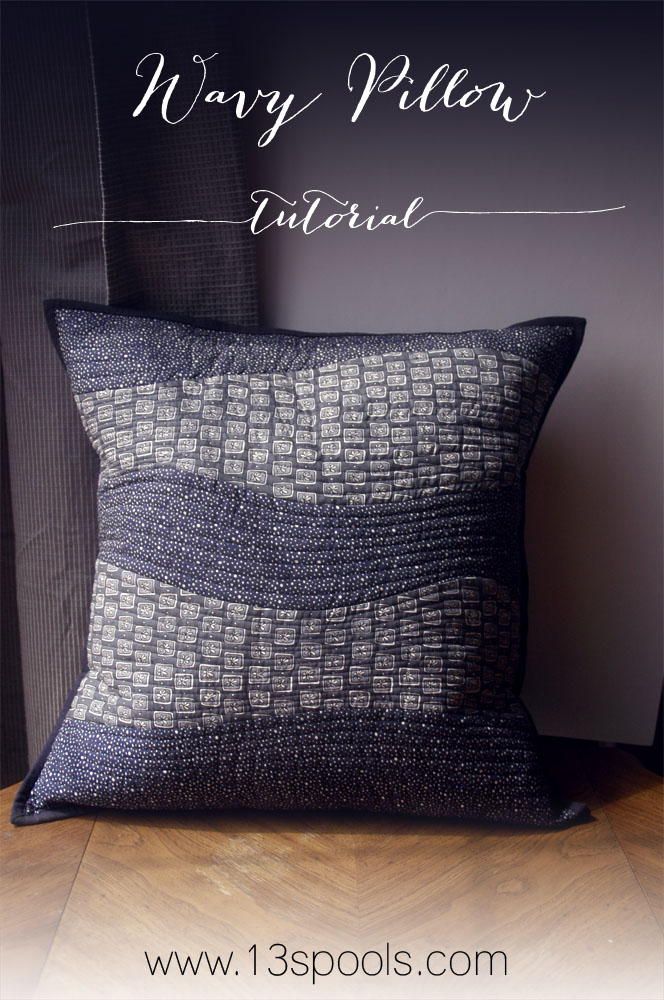
Wavy Pillow Tutorial
This post is a part of the Succulents fabric line blog hop - see all of the details here. My "official" post is tomorrow, and I'll be giving away a huge fat quarter bundle of these gorgeous Windham fabrics, so stay tuned!

This tutorial will show you how to create a 20", simple pillow cover with an envelope backing.
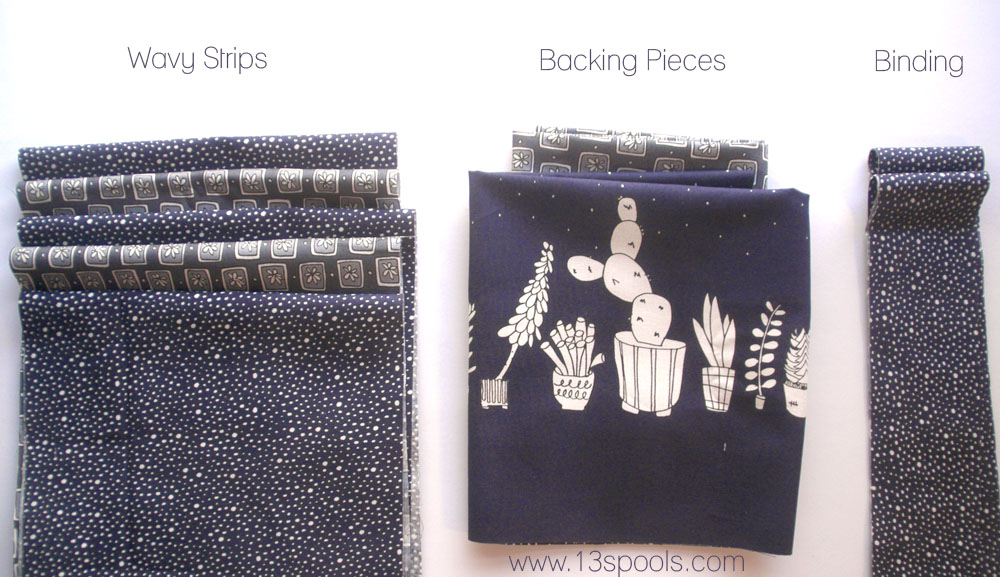
Supplies:
- Waves - (5) strips 7" x 22"
- For the quilted pillow top - (1) piece of batting and (1) piece of backing fabric, both 22" x 22"
- Envelope backing - (2) pieces 14" x 19"
- Binding - (2) 40" long binding strips of your choice of width
 Note: I started with the middle curve, but you may start wherever you would like!
1. Select your starting wave strip. Lay it down on your cutting mat and with your rotary cutter, cut a gentle curve (longer, gentler curves are easier to work with).
 2. Select the next wave strip. Lay it down on the cutting mat, just underneath the first wave strip. Make sure the first strip fully covers it, and that the left and right edges line up exactly. Using your rotary cutter, follow the gentle curve of the first strip to cutting a matching curve in the second strip.
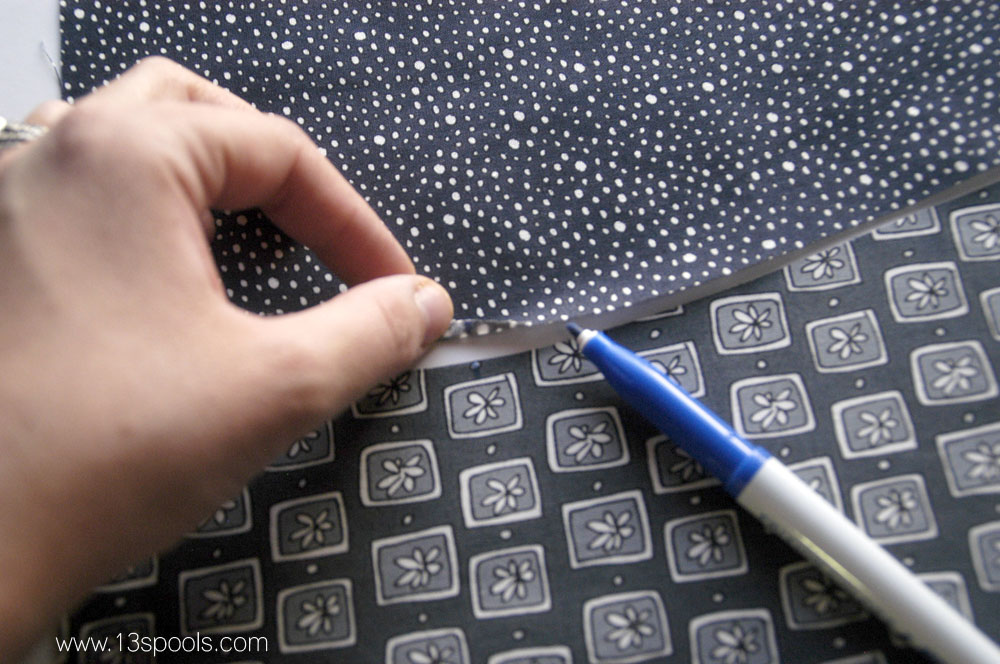
 3. Mark little hash marks every 3"-4" along the curvy edge of the first piece on the right side of the fabric.
4. Gently lift up the second piece and draw correlating hash marks along the curvy edge of the wrong side of the fabric. These marks will help you line up the fabrics as you are sewing.
 5. Flip the second piece down over onto the first piece. You'll start your seam from the left side of those long strips. Angle them so that 1) the curves just begin to match up along the right edges/seam allowance, and 2) you can create a "V" where your 1/4" seam will hit.
 6. Begin sewing your curves. Do not pin ahead of time, but gently hold the top piece with your right hand and the bottom piece with your left hand. Guide them so that they line up along the edges just as they are going under the presser foot, not before. Aim for your hash marks to match (if they don't, gently pull on the shy piece until they match, or come close).


7. Press to the side. There isn't necessarily a "better" side to press to when your curves bend both ways. If your fabrics buckle a little, don't worry! A hot iron, starch, and quilting cover a multitude of sins.
 8. Repeat steps 2 - 7 until your block is at least 20" square. If necessary, trim it down.

9. Sandwich, baste, and quilt your pillow top with your preferred methods.
 10. Trim down your pillow top to 19" x 19" (cutting it smaller than your pillow form will help it fill out nicely). Set aside.
11. Turn to your two backing pieces. Fold over and press one of the long edges in by 1/4". Press. Fold over again, and press again. Repeat with the second piece.
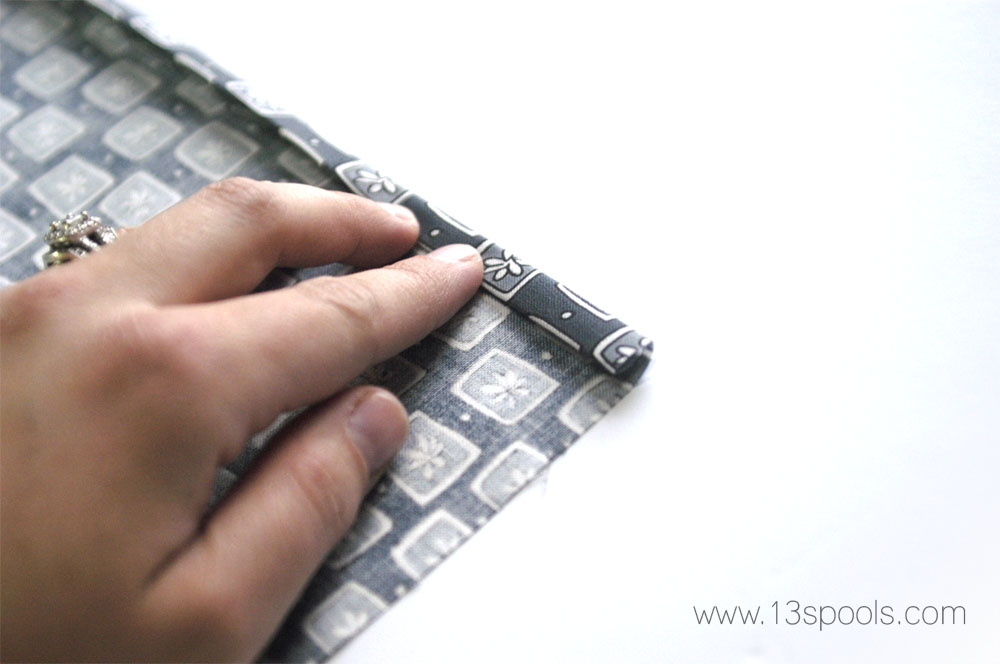 12. Stitch the hem into place.
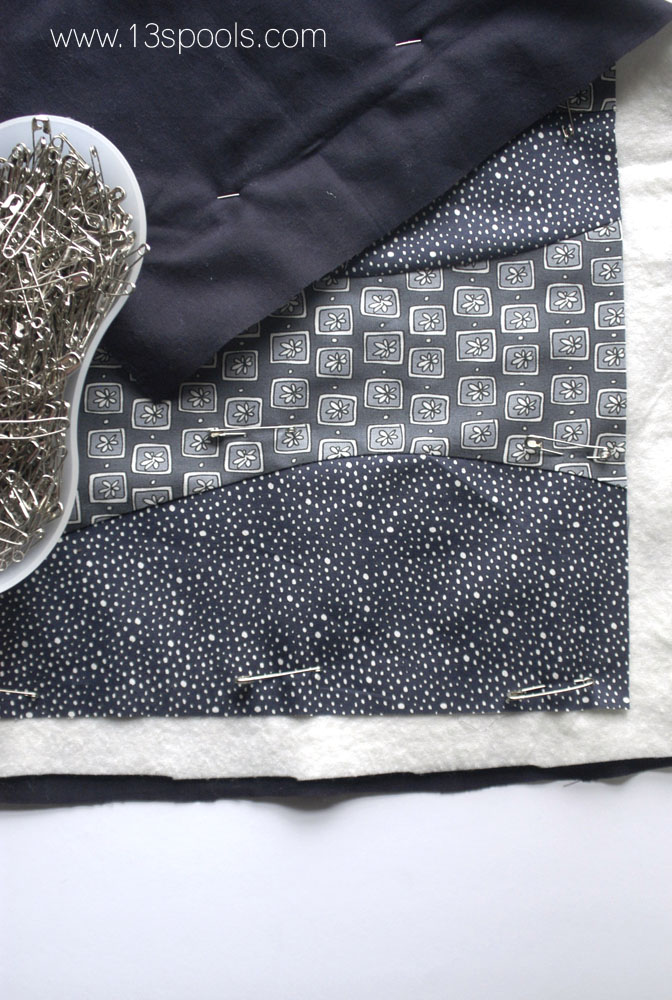
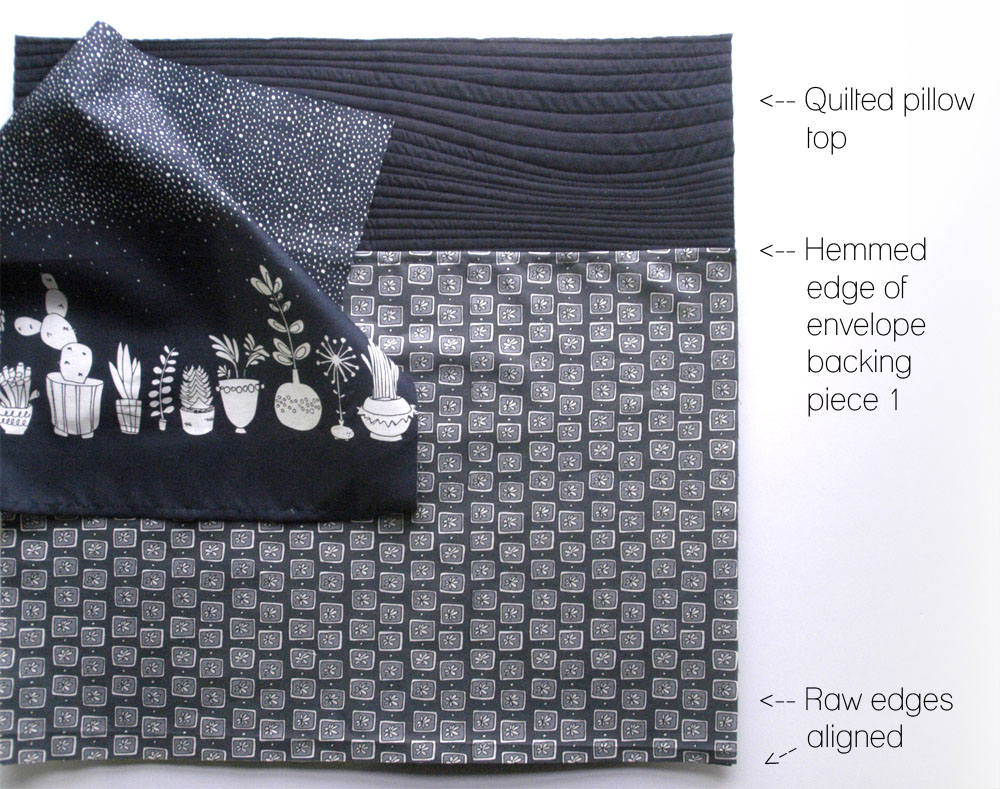
13. Create your pillow sandwich by laying down your pieces in the following manner:
1) Pillow top, wrong side up. (this is the bottommost layer)
2) Envelope backing piece 1, right side up. Line up with the bottom edges of the pillow top (raw edges aligned).
3) Envelope backing piece 2, right side up. Line up with the top edges of the pillow top (raw edges aligned).

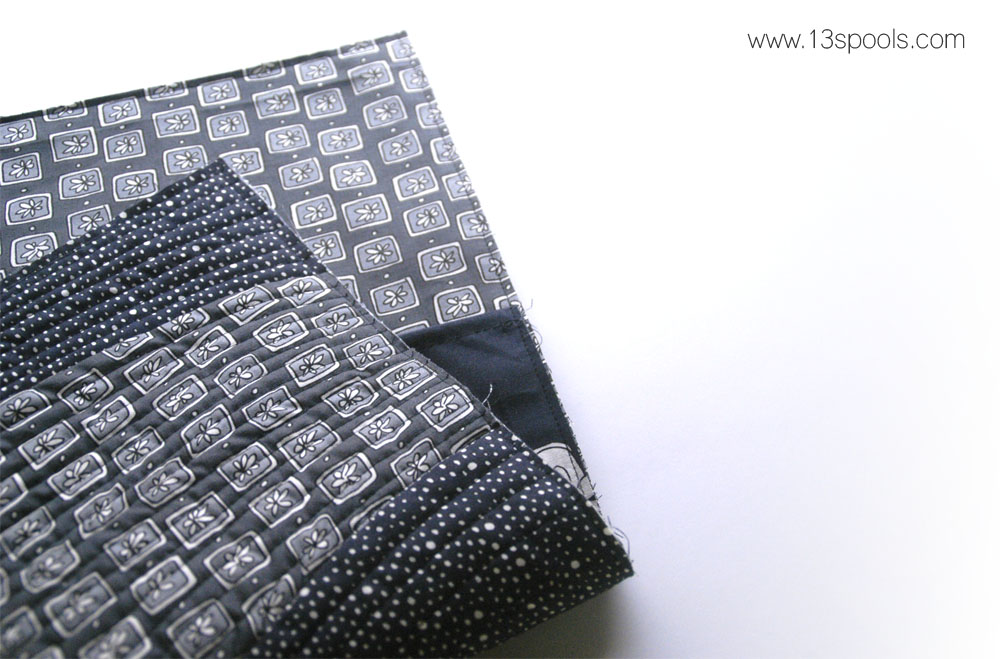
14. Pin into place. Stitch 1/8" all the way around the perimeter.
 15. Treating your pillow sandwich as if it were a mini quilt, bind using your preferred method, all the way around. I opted to sew the binding to the back first, then folded it over and machine sewed it to the front.
16. Stuff with your pillow form and enjoy!