Paper Piecing Instructions: Part I

Did you get bit by the paper piecing bug? This post is part of a three part series on how to paper piece. See Part II here and Part III here. I'll start by sharing with you what I think are the most essential tools for the trade.
Stay tuned for the other posts!
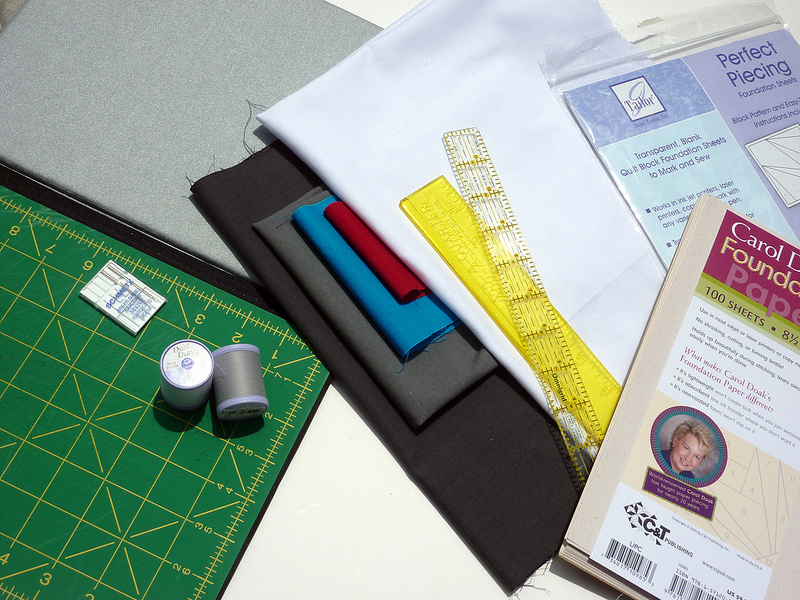
Supplies you'll need (or just want!):
Self-healing cutting mat & ironing station - They should be in close proximity to your sewing machine since you'll be hopping back and forth so often.
Rotary cutter (not pictured) - I like the Olfa Ergo rotary cutter.
Ruler - You can use a clear, gridded ruler (like the Omnigrid ruler), but the Add-a-Quarter ruler is by far the best ruler for paper piecing! The 12" length works well for this project.
Needles - A larger, 90/14 needle (like your quilting needles) will create larger holes in the paper, making it easier to remove at the end.
Paper - You can most definitely use normal printer paper (I pieced the entire Fire & Ice quilt with normal paper), but a pack of paper piecing paper is so much better and not very expensive! At just under $10 per 100 pack, Carol Doak's Foundation Paper is my number one suggestion. For beginners, a paper you can see through makes the process even easier. There are some papers that are vellum like, but I wouldn't suggest these, as they are harder to tear than even regular printer paper. I would most definitely suggest June Tailor's Perfect Piecing Foundation Sheets if you would like to go with a transparent paper. These are a little pricier, so you might start with them and then switch to Carol Doak's paper when you feel more comfortable with the method.

Thread - Again, you can use any thread, but Coats & Clark just came out with a great new thread meant specifically for paper piecing! It's the thread on the purple spool and can be picked up at Jo-Anns. It's a little hardier than regular thread, and reminds me a little of their handquilting thread, but less wirey.
Piece of cardboard - This simply makes it easier to fold back your paper accurately along the seam line. A thinner piece works better. I use the same cardboard that I fold my fabric stash around (I bought them at a comic book store, they help keep magazines flat for storage), but you could always use the cardboard piece that comes with your Carol Doak paper.
---After gathering supplies, your first step is to print out your templates. If you are printing from your computer (not copying), make sure "do not scale" is checked in your print dialogue box. Measure the template after printing one version. Most of the time, the pattern will indicate how wide the printed template should be, or will have a 1" square to measure against.
And the last step of preparation is to gather your fabric!
A lot of you are here for the Prism Along. If that's you, I have a few more instructions for you before tomorrow's post.

Because paper piecing designs have lots of bias cuts, I suggest starching first. You should always cut fabric for one block to see if those cuts work out for you before cutting out the fabric for the entire quilt. You might end up wasting a lot of fabric otherwise! These are the sizes I cut my fabrics:
Piece 1 (white): 2.75" x 12"
Pieces 2 & 3 (grays): 3.5" x 10.5"
Pieces 4 & 5 (colors): 2.5" x 6"
I suggest cutting out enough fabric for one block. If those sizes work well for you, then you can cut out the rest of your fabric with the same sizes. These sizes work well with the method I will be presenting tomorrow.
Until then!