Blended Quilting & Motifs
Here for my second tutorial on Graffitti Quilting! See my first tutorial on Graffitti Quilting here.

Today, I'm just presenting one concept - motifs. By "motif", I mean a larger element, rather than a smaller-scale background fill. Unlike fillers, a motif will not fit into just any area.
There are three ways I place a motif:
1) Working a slight ways away from your existing, quilted area, quilt your motif. Then quilt around the motif with your free motion fillers. This works great for any design that you don't want to draw out ahead of time.
I touched upon this concept last time when I showed you how I quilted my feather. I cannot necessarily fit a feather into just any area - I can only fit a feather into a larger, open space. It would be insane to quilt impromptu free motion pebbles (or another design) into the exact outline of a feather, and then quilt the feather inside with precision. Instead, I need to work on the feather first.
Quilt the feather...
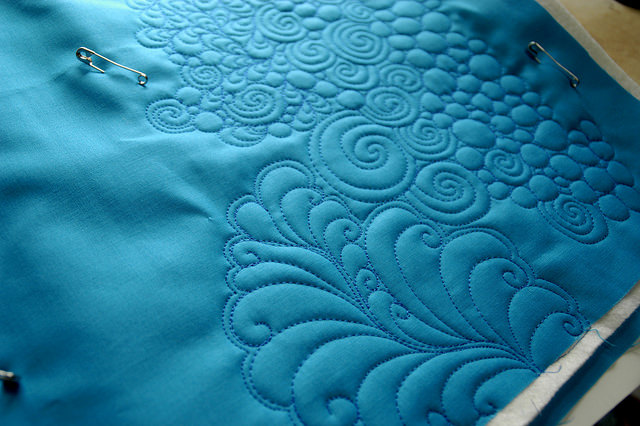
Fill in the area to the right...

And then the area around the left and upper right part of the feather, connecting the feather to the everything you've done so far.

This method allows you to concentrate on just quilting the motif without worrying right away about filling in around in. You don't even have to decide which surrounding fillers you want to use until you're done, so if you're looking to procrastinate a bit...here's your ticket :)
2) Using your preferred marking tool, mark an area to "reserve" for your motif. Quilt your fillers up to the marked area, then return to quilt your motif.
I ended up using this method extensively with one motif in my Dyed quilt.
I began to feel that this quilt was looking very busy, so I thought I might switch to a single background filler (an orange peel). I decided it would fill in areas like ivy on a wall - covering some larger areas, and then some patches.
In this case, I would consider the orange peel pattern to be my motif. (It's not like the feather, in that this design can fit in many areas, but it is a design that needs to be marked ahead of time, and so requires more planning. I couldn't just wing it, especially with the look I was going for.)

I drew an outline of several areas I wanted to save for the orange peel pattern, which you can see in the photo below. I also drew some little crosshatches inside the areas meant for the orange peel quilting so I didn't get mixed up.
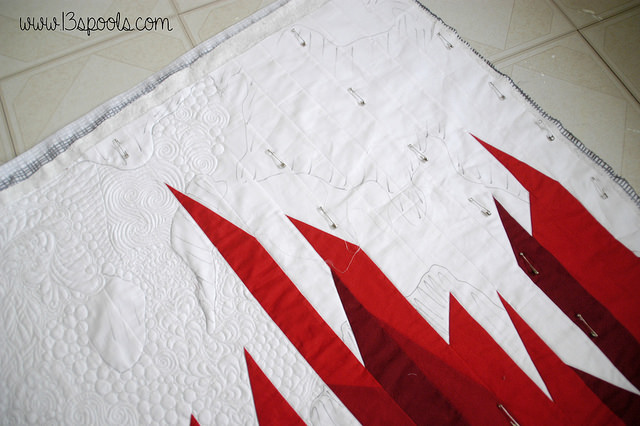
I quilted the areas around, and then went back and filled them in with the orange peel pattern.

You could still quilt the orange peel areas before the fillers, but the main point is that it is marked and determined ahead of time.

3. Using your preferred marking tool, mark the exact - and entire - motif you want to quilt.
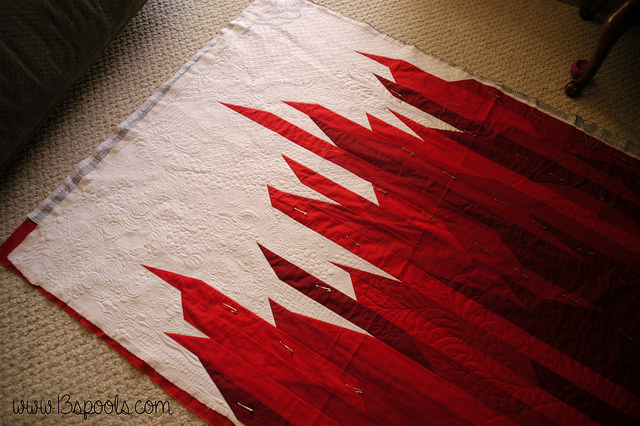
This is not my preferred method, as I generally prefer to FMQ - well, freely. However, sometimes I meet a design that I want to use, but just am not getting the hang of. For example, I've practiced french braids (or whatever you would like to call them) a number of times, but just can't get them looking right. In cases like this, I think it can be great to mark out an entire design ahead of time so that you can practice the pattern and build up your muscle memory to be familiar with the motions. I completely marked out a few of these french braids and love the result.

In another location, I wanted to quilt a feather that was hiding behind the peaks of red fabric. However, I'm fairly new at feathers, and wasn't confident in my ability to make it work. Enter marking pen crutch. The result looks great! And once the marking disappears, no one will be any wiser. Well. Except you folks :)

So, there you have it! Now you can tackle graffitti quilting, too. And for anyone who's curious - here's a preview of what I'm planning for the red part of this quilt:
