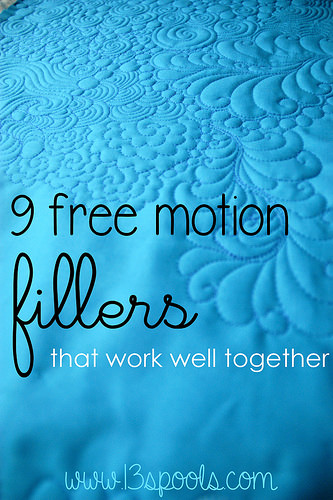
Blended Quilting Tutorial
See my second post on Graffitti Quilting here!Some of you were wondering how I decided which free motion quilting patterns to use, and when, while quilting my "Dyed" quilt. I thought I'd do a few posts on how to create an "improv" or "graffiti" quilted background fill.

The first step is having a repertoire of great filler patterns that work well together. I'll be focusing on that today.
These filler patterns will be your go-tos in a pinch. You should practice them a lot so that you can fit them into strange spaces. After lots of experience, you'll be able to look at an area and instinctively know what designs will fit there easily. I don't have a large number of patterns that I cycle through, but the ones that I do know, I'm very comfortable with. I'm also very willing to try out new patterns - in the grand scheme of things, if you struggle with one small area, onlookers will never notice. They'll look at the overall picture of your project. Also - matching thread hides a multitude of sins :)
They need to be able to fit in a variety of areas AND they need to work well together. This is key. Not all designs work well together - for example, I don't care for pebbling running up against stippling. In pebbling, all your shapes touch, whereas your lines should never touch or cross in stippling. When you pebble next to stippling, do you leave an open space? Do you run up against the outermost lines? Where do you stop?
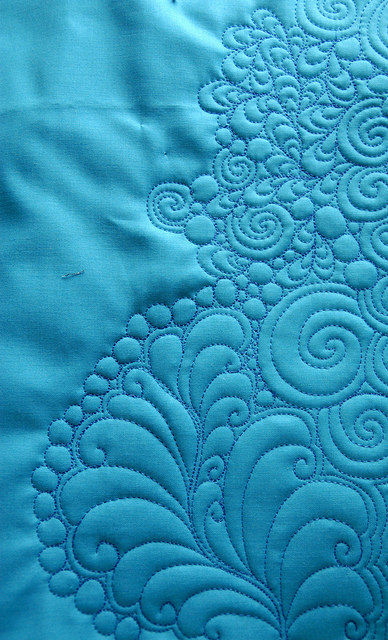
Take instead pebbling and spiraling - these patterns work together beautifully, and you can roll right from one into another:

Paisleys also work well with spirals and pebbles - you can very easily start this design peeking out from between the circles.

When you are done with paisleys, you can work in some more pebbles and spirals.
Feathers also work really well with all of these designs, since their petals are curvy in nature. I like to echo once around the finished feather to distinguish it from the rest of the background.

I like to quilt this design a little ways away from what I already have done, and then fill in the areas in between. Here, I've elected to do some simple echoing.

And on the left side of the feather, I've lined up some pebbles.
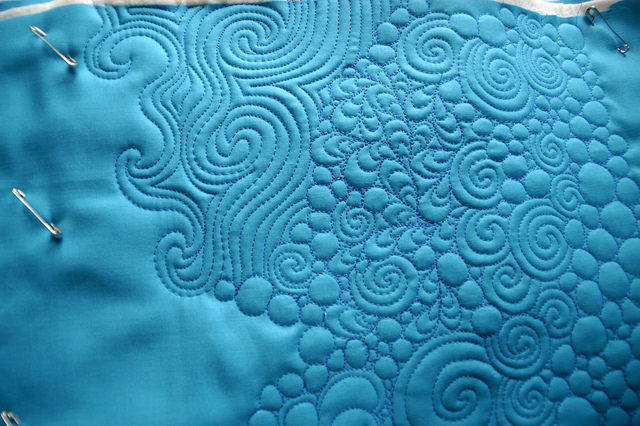
Ocean Current works fabulously with these curvy designs. It's basically a combination of swirls and echoing. Draw the swirl...
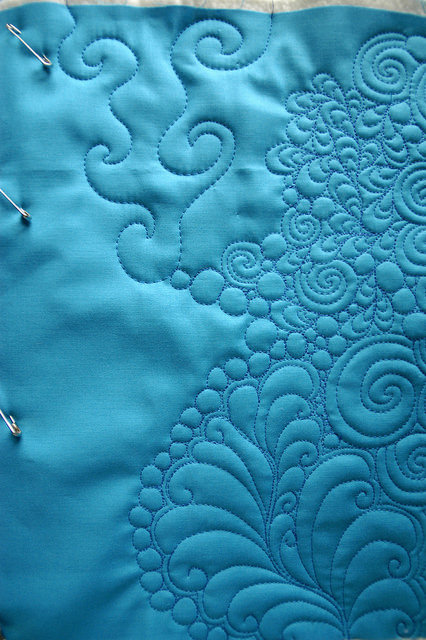
...then echo (on one side or both). Use the previous designs as an anchor that you can travel along. (Do you see how this would be difficult to accomplish using a stipple as an anchor design?)
Stacked coins, echoing clamshells, and flowers are circular/curvy, touching FMQing designs that also work well with all of the aforementioned designs. I've done a looser version and tighter version of the stacked coins.

Hopefully that gives you a good start! If you are wanting to try quilting a graffiti-style filler, make a list of some of the designs that 1) you are confident with and 2) work well together. Of course, it's never too late to learn some new patterns! Try some of the ones I listed, or see Leah Day's site with tutorial videos here.
In brief, here's a list of the designs I suggested today:
- pebbles (my favorite)
- spirals
- paisleys
- feathers
- echoing
- ocean current
- stacked coins
- echoing clamshells
- flowers
What are some of your favorite free motion quilting fillers? Any that you would add to this list?
(Linking up to Free Motion Monday)